
Screen Record on iPhone With Sound: 5 Easy Methods
You are watching a clip you want to save, or helping a relative fix a setting, and you wish you could just show them. Good news: you can screen record on iPhone in a few taps, and the video can include sound. Apple builds the tool right into iOS, so you do not need to download anything or pay for an app. This guide walks you through five easy methods, from the quick built-in button to a Mac-based option that gives you more control. You will also learn how to fix silent videos, what to do when the feature refuses to start, and where your clips go afterward. Each method is short, and you can pick the one that fits your situation.
What Sound Can an iPhone Capture?
Before you press record, it helps to know what kind of sound you will get. Many people ask how to record internal audio iPhone apps produce, and the answer is simpler than they expect: the built-in recorder captures it by default. That means music, game effects, video playback, and app sounds all end up in your clip. The microphone is a separate option. Turn it on and your iPhone also picks up your voice and the noise around you. That works well for tutorials, but not if a dog is barking next door. Volume matters too, because a very low or muted media volume can give you a quiet recording. Some streaming apps also block protected content, so you may see a black screen. Finally, switch on a Focus mode first, so a stray notification does not pop up when you screen record on iPhone. You can also review the Apple guide to restoring your iPhone to factory settings for additional technical documentation and model-specific notes.
5 Easy Ways to Screen Record on iPhone With Sound
Method 1: Use the screen recording Control Center button
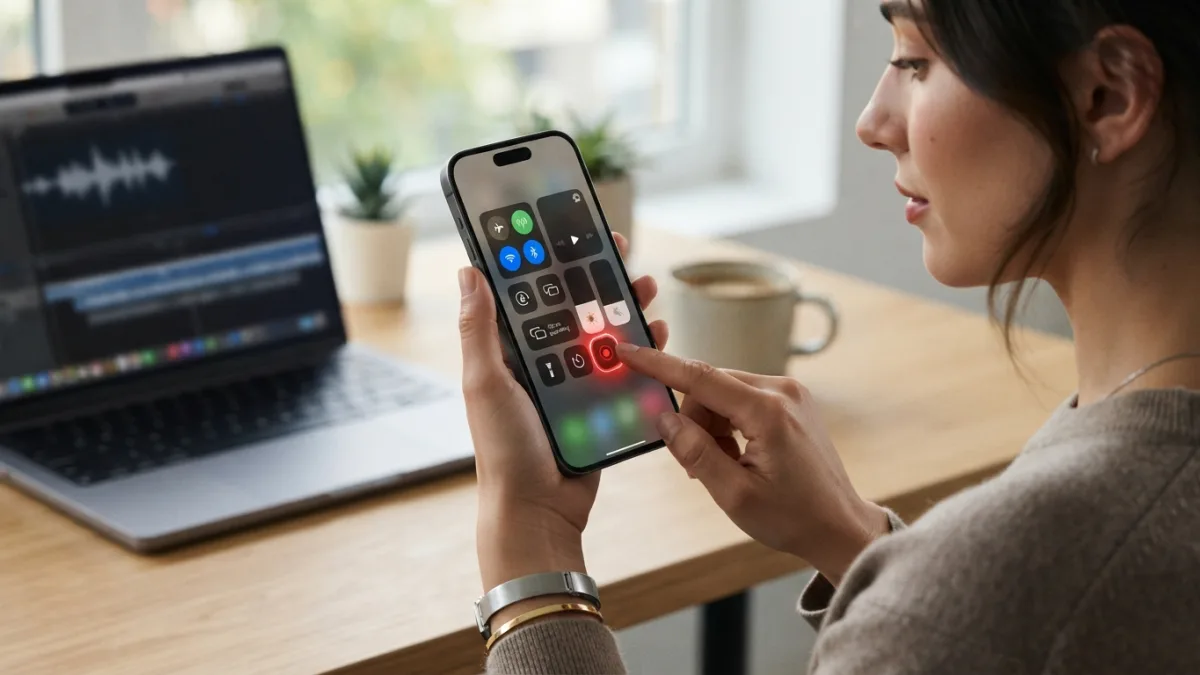
The fastest route starts with the screen recording Control Center shortcut. First, open Settings, tap Control Center, and add Screen Recording if it is not there yet. Then swipe down from the top-right corner of the screen (or up from the bottom on iPhones with a Home button) to open Control Center. Tap the round record button. A three-second countdown starts, and then everything on your screen, plus the sound your apps play, goes into the video. To stop, tap the red indicator at the top of the screen and confirm, or tap the record button again in Control Center. Your video lands in the Photos app. For a full walkthrough of iOS features, Apple publishes the official iPhone User Guide, which is handy if your menus look slightly different.
Method 2: Record screen with microphone
Want to explain what you are doing as you go? Here is how to record screen with microphone audio added. Open Control Center, but do not tap the record button right away. Instead, touch and hold it. A small panel opens with a microphone icon at the bottom. Tap that icon so it turns red and says the microphone is on. Then tap Start Recording and wait for the countdown. Now your voice joins the sound from your apps. This setup is great for how-to videos, gameplay commentary, or tech support for a friend. Speak clearly and keep the phone away from loud fans or street noise. If you wear Bluetooth earbuds, your iPhone may use their microphone instead, so do a ten-second test first and play it back before you record something important.
Method 3: Record FaceTime with audio
You can also record FaceTime with audio by using the same built-in recorder. Start your call, open Control Center, touch and hold the record button, and turn the microphone on if you want your own voice captured. Then tap Start Recording. The other person’s voice comes through your phone’s sound, so it normally lands in the video. Do a short test call first, because results can vary with your setup. Here is the part that matters most: get permission. Many places require consent from everyone on a call before you record it, and the rules differ by location. The overview of telephone call recording laws on Wikipedia gives a helpful starting point. When in doubt, tell the other person you are recording and wait for a clear yes.
Method 4: Use QuickTime on a Mac
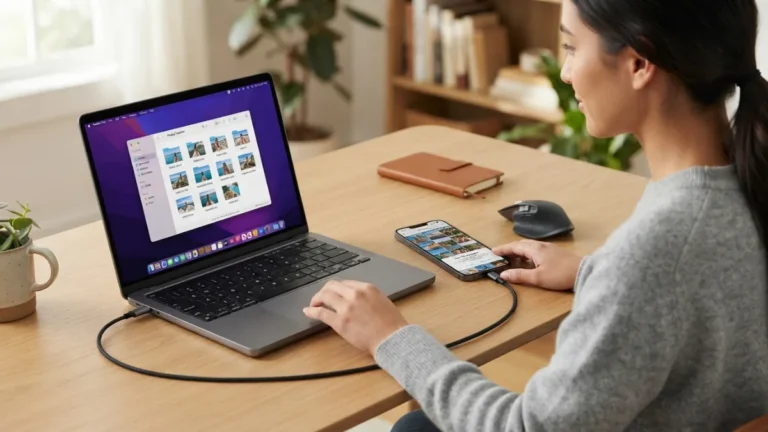
If you own a Mac, you can screen record on iPhone through a cable and get a bigger preview while you work. Connect your iPhone to the Mac, and tap Trust This Computer if asked. Open QuickTime Player, click File, then New Movie Recording. Next to the red record button, click the small arrow. Under Camera, choose your iPhone. Under Microphone, choose your iPhone as well, so the sound playing on the phone comes along. Press record, use your phone as usual, and stop when you finish. The file saves on your Mac, which makes editing easier. This method suits long tutorials or work presentations. Apple explains the app in the QuickTime Player User Guide, in case any step looks different on your macOS version.
Method 5: Try a trusted third-party app
Most people never need this one, but a third-party app can help in special cases. Some apps add extras such as drawing tools, face-cam overlays, or built-in editing. They usually run on the same iOS recording system you already know, so the sound rules stay the same: you pick whether to include the microphone. Be careful, though. A screen recorder can see everything on your display, including messages and passwords. Choose apps from well-known developers, read recent reviews, and check what permissions and subscriptions they ask for. Avoid anything that demands payment details before you can try it. Delete the app once you finish if you will not use it again. Also check whether the app you want to capture has its own record button, since some video call and meeting tools include one.
How to Fix iPhone Screen Recording No Sound
Few things are more annoying than finishing a clip and hearing silence. If you face iPhone screen recording no sound, start with the basics. Raise the media volume while the video plays, and check that your phone is not stuck on a muted setting. Next, think about what you wanted: if the microphone icon was off, your voice will not appear, but app sound should still be there. If both are missing, the app itself may block audio capture, which can happen with protected content. Try disconnecting Bluetooth headphones or speakers, because audio sometimes goes to them instead. Then restart your iPhone and test again with a different app, such as a simple music player. If one app stays silent but others work, the app is the cause, not your phone.
Screen Recording Not Working? Try These Fixes
When the button does nothing, or the recording fails to save, the cause is usually small. Open Settings, then Screen Time, then Content & Privacy Restrictions, and make sure screen recording is allowed. This setting is common on phones managed by a parent or an employer. Next, check your storage. A full iPhone cannot save new video, so delete old files and try again. If you want to use the button inside apps, open the Control Center settings and confirm that access within apps is on. Restarting the phone solves many odd glitches, and so does installing the latest iOS update. If you still cannot screen record on iPhone, the app may be blocking capture on purpose. In that case, try a different app to confirm that your phone itself works.
How to Trim iPhone Screen Recording Clips
Raw recordings often include a few awkward seconds at the start and end, such as the moment you reach for the stop button. You can fix that in the Photos app. To trim iPhone screen recording videos, open the clip, tap Edit, and look at the timeline under the video. Drag the yellow handles at either end until only the part you want stays between them. Press play to check the result. Then tap Done. You can choose Save Video to replace the original or Save Video as New Clip to keep both versions. The second option is safer if you are not sure about your edit. The same editing screen lets you adjust the look of the video, though most people only need a clean start and finish.
How to Find iPhone Screen Recordings Later
Your clips do not hide in a special app. They save to the Photos app, right alongside your pictures, but they can get buried in a busy library. To find iPhone screen recordings quickly, open Photos and tap Albums. Scroll down to Media Types, then tap Screen Recordings. Every clip appears there in order, with the newest at the bottom. From that screen you can share, edit, or delete videos in a few taps. If you need to send a large file, use AirDrop, a messaging app, or cloud storage rather than email. Clean out old recordings now and then, because video files take up a lot of space and can cause the saving problems mentioned earlier.
Final Thoughts
You now have several good ways to screen record on iPhone with sound. For most situations, the Control Center button is all you need: it is quick, free, and reliable. Add the microphone when you want to talk through a task, use the FaceTime approach with care and permission, and switch to a Mac when you need more room to work. If something goes wrong, check volume, restrictions, and storage first. Then trim the clip, find it in your Screen Recordings album, and share it. A few minutes of practice makes the whole process feel natural, so try one short test recording today.
FAQ
Can I screen record on iPhone with sound?
Yes. The built-in recorder captures the sound your apps play automatically. To add your own voice, touch and hold the record button in Control Center and turn on the microphone before you start.
Why does my screen recording have no audio?
Common causes include a very low or muted volume, Bluetooth audio going to another device, or an app that blocks sound capture. Check your volume, disconnect wireless devices, and test with another app.
Where do screen recordings go on my iPhone?
They save in the Photos app. Open Albums, scroll to Media Types, and tap Screen Recordings to see all of them in one place.
Is it legal to record a FaceTime call?
It depends on where you and the other person live. Many places require everyone’s consent. Ask permission before you record, and check your local rules if you are unsure.
Can I edit a screen recording after I save it?
Yes. Open the video in Photos, tap Edit, and drag the handles to cut the start or end. Choose to save over the original or as a new clip.
Related guide: Screen Record on Android: 5 Easy Ways to Capture Sound

One Comment
Comments are closed.