How to Screen Record on a Mac (With Sound)
Screen record on mac trips up a lot of people, but it does not have to be complicated once you know the right steps.
You just nailed the perfect Zoom call, finished a tricky tutorial, or captured a glitch that customer support needs to see, and now you need proof with sound attached. Learning how to screen record on a Mac with audio is one of those skills that seems complicated until you actually try it, and then it becomes something you use every week. Whether you want to narrate a presentation, save a Spotify playlist demo, or document a video chat, Apple has already built the tools you need right into macOS. This guide walks through every method, from the built-in options to third-party apps, so you can pick what fits your situation best. If you want to dig deeper, our guide on How to Update macOS Safely Without Losing Data covers this in more detail. This is a common part of dealing with screen record on mac, and it is worth keeping in mind.
Why Screen Recording With Sound Matters
A silent screen recording only tells half the story. If you’re making a tutorial, reacting to a video, or reporting a bug, sound adds context that visuals alone can’t capture. Think about how much less useful a cooking demo would be without the narrator explaining each step, or how a software walkthrough loses value if viewers can’t hear the click sounds or verbal cues. Audio also matters for accessibility and clarity, especially when you’re sending a recording to a coworker who needs to understand exactly what happened without a lengthy written explanation. That’s why so many people search for ways to record screen with audio rather than settling for a muted clip that requires extra typing to explain. Many people run into this exact issue with screen record on mac at some point.
Screen Record on Mac Using QuickTime Player
The most straightforward way to screen record on a Mac is through QuickTime Player, an app that’s already sitting in your Applications folder. It’s free, reliable, and doesn’t require downloading anything extra. QuickTime screen recording has been a go-to option for Mac users for years because it’s simple enough for beginners but still gets the job done for quick clips. The catch is that QuickTime’s default settings only capture your microphone, not the sound playing from your computer, so you’ll need an extra step if you want to grab internal audio like music, video calls, or game sound effects. Keeping screen record on mac in mind here will save you time later on.
Steps to Record With QuickTime
- Open QuickTime Player from your Applications folder or Spotlight search.
- Click “File” in the menu bar, then select “New Screen Recording.”
- A small control bar will appear. Click the arrow next to the record button to choose your microphone.
- Select whether you want to record the full screen or just a portion.
- Click the red record button to start, and click the stop icon in the menu bar when you’re finished.
- Your recording will open automatically so you can trim it and save it wherever you like.
How to Capture Internal Audio on a Mac
Here’s where things get a little trickier. QuickTime alone won’t capture internal audio Mac users often want, like sound from a browser tab, a music app, or a video call. Apple restricts this by default for privacy reasons, so you need a virtual audio driver to bridge the gap between your system sound and the recording. Two of the most popular free tools for this are BlackHole and Loopback, both of which create a virtual audio device that routes your Mac’s internal sound into whatever recording software you’re using. Once installed, you can select that virtual device as your audio input, and suddenly QuickTime (or any other recorder) can hear what your computer is playing, not just what your microphone picks up. This connects closely with another common issue — see How to Connect a Mac to a TV or External Monitor for more on that. This detail matters more than it seems once screen record on mac comes up again.
Setting Up BlackHole for Internal Audio
BlackHole is a free, open-source virtual audio driver that many Mac users rely on because it doesn’t cost anything and works well with recent macOS versions. After downloading and installing it, open the Audio MIDI Setup app on your Mac and create a “Multi-Output Device” that includes both your speakers and BlackHole. This way, you’ll still hear the audio while it’s being routed into your recording software. Once that’s set up, go into QuickTime’s recording settings and choose BlackHole as your microphone input instead of your Mac’s built-in mic. It takes a few extra minutes to configure, but once it’s done, you won’t need to repeat the process every time. It is one of those small things that makes screen record on mac easier to manage overall.
Using Built-In Screenshot Toolbar (macOS Mojave and Later)
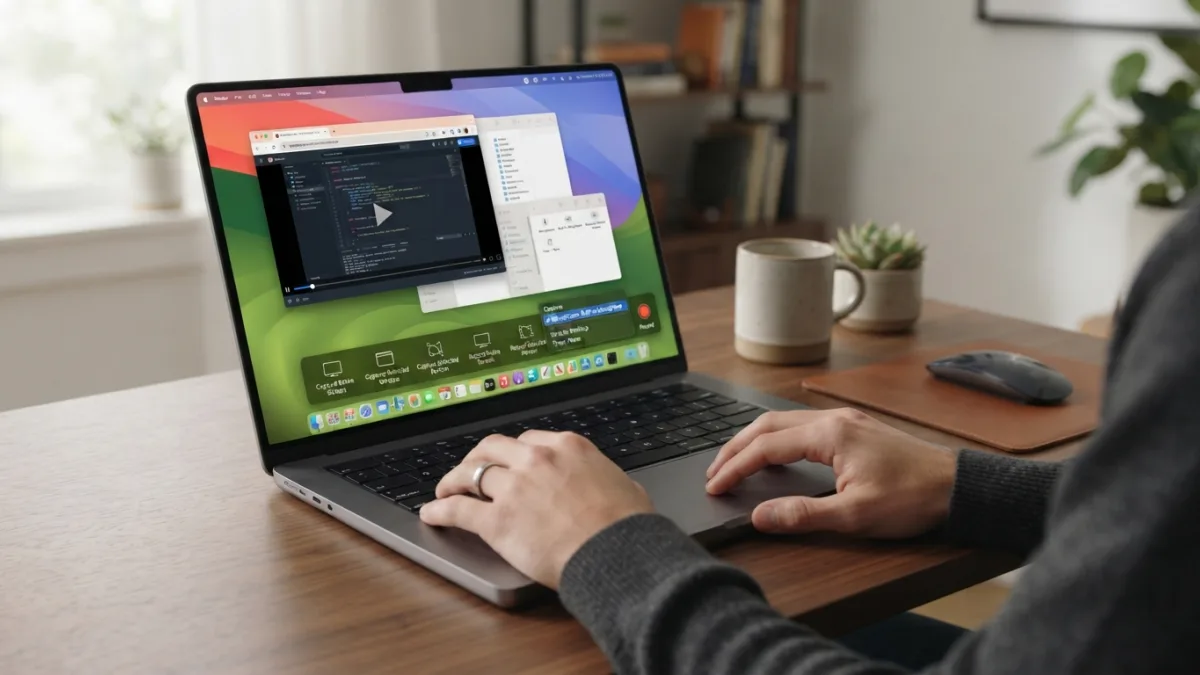
If you’re running macOS Mojave or a newer version, there’s an even quicker way to screen record on a Mac without opening QuickTime at all. Press Shift + Command + 5 and a small toolbar will pop up at the bottom of your screen with options to capture the entire screen, a selected window, or a specific portion. This toolbar also lets you choose your microphone directly from the “Options” menu, making it slightly faster than digging through QuickTime’s menus. It’s a convenient shortcut for anyone who records screens often and doesn’t want to launch a separate app every time. The recording gets saved to your desktop by default, though you can change that location under the same Options menu. This is a common part of dealing with screen record on mac, and it is worth keeping in mind.
Best Screen Recorder for Mac: Third-Party Options
While Apple’s built-in tools handle most everyday needs, some people want more control over editing, video quality, or streaming features. If you’re looking for the best screen recorder for Mac beyond what comes pre-installed, a few names come up often among content creators and professionals. OBS Studio is free and extremely popular for its flexibility, especially among gamers and streamers who need to mix multiple audio sources. ScreenFlow and Camtasia are paid options that include built-in editing tools, which save you the step of exporting footage to a separate video editor. Elgato’s Camera Hub and CleanShot X are also worth a look if you want polished recordings with minimal setup fuss. You might also find our article on How to Recover Deleted Files on a Mac helpful here. Many people run into this exact issue with screen record on mac at some point.
Comparing Popular Mac Screen Recording Software
| Tool | Price | Best For | Internal Audio Support |
|---|---|---|---|
| QuickTime Player | Free | Quick, simple recordings | Requires BlackHole or Loopback |
| OBS Studio | Free | Streaming and advanced setups | Built-in support |
| ScreenFlow | Paid | Tutorials with editing | Built-in support |
| Camtasia | Paid | Professional training videos | Built-in support |
| CleanShot X | Paid | Clean, simple captures | Built-in support |
Tips for Better Audio Quality When Recording
Getting sound into your recording is only half the battle; making it sound clear is just as important. Background noise, a weak microphone, or poor room acoustics can ruin an otherwise great recording. Before you hit record, test your microphone levels in System Settings to avoid audio that’s too quiet or distorted from being too loud. If you’re narrating, try to record in a quiet room and keep the microphone a consistent distance from your mouth throughout. For internal audio, double-check your Multi-Output Device is selected correctly, because it’s easy to accidentally record silence if the routing isn’t set up right. A quick five-second test recording before the real one saves a lot of frustration later. Keeping screen record on mac in mind here will save you time later on.
Editing and Sharing Your Recording
Once you’ve got your recording, QuickTime Player itself offers basic trimming tools under the “Edit” menu, which is handy if you just need to cut off a rough start or ending. For more advanced edits, like adding captions, cutting out mistakes in the middle, or combining multiple clips, you’ll want to move the file into iMovie, which comes free on every Mac, or a paid editor like Final Cut Pro. When you’re ready to share, consider the file size and platform. Mac screen recordings are usually saved as .mov files, which work fine for most uses but might need converting to .mp4 if you’re uploading somewhere that doesn’t support QuickTime’s native format. This detail matters more than it seems once screen record on mac comes up again.
Common Problems and How to Fix Them
A few issues pop up again and again for people trying to screen record on a Mac. If your recording has no sound at all, check that the correct microphone or virtual audio device is selected in the recording settings before you start, not after. If the audio is out of sync with the video, try closing other resource-heavy apps running in the background, since limited processing power can cause lag. Permission errors are another common snag. macOS requires you to grant screen recording and microphone access in System Settings under Privacy & Security, and skipping this step is the most frequent reason recordings fail to start at all. For a related walkthrough, check out How to Uninstall Apps Properly on a Mac. It is one of those small things that makes screen record on mac easier to manage overall.
Frequently Asked Questions
Can I screen record on a Mac without downloading any extra software?
Yes. Both QuickTime Player and the Shift + Command + 5 toolbar are built into macOS and let you record your screen with microphone audio at no extra cost. This is a common part of dealing with screen record on mac, and it is worth keeping in mind.
Why doesn’t QuickTime capture sound from my computer, like music or video calls?
Apple’s privacy settings prevent QuickTime from accessing internal audio by default. You’ll need a virtual audio driver like BlackHole or Loopback to route that sound into your recording. Many people run into this exact issue with screen record on mac at some point.
What’s the easiest way to capture internal audio on a Mac for free?
BlackHole is a popular free option. After installing it, set up a Multi-Output Device in Audio MIDI Setup and select BlackHole as your input in your recording app. Keeping screen record on mac in mind here will save you time later on.
Is there a time limit on Mac screen recordings?
There’s no strict built-in limit, but very long recordings create large files that can slow down your Mac or take up significant storage space, so it’s smart to keep an eye on file size for lengthy sessions. This detail matters more than it seems once screen record on mac comes up again.
What’s the best screen recorder for Mac if I need professional editing features?
ScreenFlow and Camtasia are strong choices if you want built-in editing tools alongside recording, while OBS Studio is a solid free option for more advanced or live-streaming needs. It is one of those small things that makes screen record on mac easier to manage overall.