Screenshot on a Mac: 7 Easy Steps to Capture Anything
Every Mac user eventually needs to capture what’s on their display, whether it’s a funny error message, a boarding pass, or proof of a hilarious group chat. Learning how to take a screenshot on a mac is one of those small skills that saves you time again and again, yet plenty of people still fumble around trying to remember the right keys. The good news is that Apple has built several simple, reliable methods directly into macOS, so you don’t need to download anything extra unless you want more advanced editing features. Below, we’ll walk through seven easy steps that cover everything from grabbing your whole desktop to snapping just one window, plus a few tricks that make the process even smoother.
Step 1: Capture the Entire Screen
The most basic way to screenshot on a Mac is to capture everything visible on your display in one shot. Press Shift + Command + 3, and macOS will instantly save an image of your full screen to your desktop. You’ll hear a satisfying camera shutter sound, and a small thumbnail will briefly pop up in the corner of your screen. If you click that thumbnail quickly, you can mark it up or trim it before it saves; if you ignore it, it saves automatically as a PNG file. This method is perfect when you want to show someone exactly what your whole workspace looks like, including your menu bar, open apps, and desktop icons. If you want to dig deeper, our guide on How to Screen Record on a Mac (With Sound) covers this in more detail. This is a common part of dealing with screenshot on a mac, and it is worth keeping in mind.
Step 2: Capture a Selected Portion of the Screen
Sometimes you only need a small piece of information, not your entire display. For that, use Shift + Command + 4, which turns your cursor into a crosshair you can drag across any area you want. Once you release the mouse or trackpad, macOS captures just that selection and saves it to your desktop. This is one of the most popular mac screenshot shortcut combinations because it’s fast and precise, ideal for grabbing a single paragraph, a chart, or part of an email without extra clutter around it. If you hold the spacebar while dragging, you can reposition your selection box before releasing it, which is handy if you didn’t line it up perfectly the first time. Many people run into this exact issue with screenshot on a mac at some point.
Step 3: Capture a Specific Window
If you want a clean image of just one open window, such as a browser tab or a document, there’s a shortcut for that too. Press Shift + Command + 4, then tap the spacebar, and your cursor will turn into a small camera icon. Hover over any open window, and macOS will highlight it in blue; click your mouse, and it captures that window alone, complete with a subtle drop shadow that makes it look polished. This method is great for tutorials, presentations, or customer support tickets where you need to show exactly what’s happening in one app without background distractions. It’s arguably the cleanest way to capture screen mac content for professional use. Keeping screenshot on a mac in mind here will save you time later on.
Step 4: Use the Screenshot Toolbar for More Control
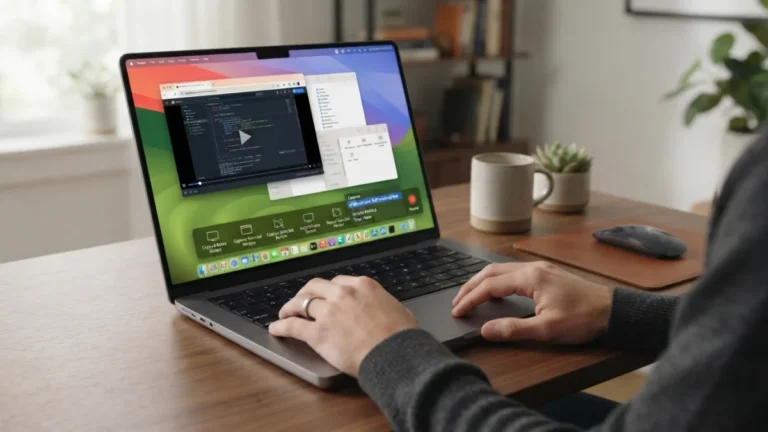
Newer versions of macOS include a built-in screenshot tool mac users can access with Shift + Command + 5. This opens a small toolbar at the bottom of your screen with options to capture the entire screen, a selected window, or a custom portion, along with buttons for recording video. It’s essentially a control center for everything screenshot-related, and it stays open so you can take multiple captures without repeating the shortcut each time. You can also click “Options” within this toolbar to choose where your screenshots save, set a countdown timer, or decide whether the cursor appears in your image. According to Apple’s official support documentation, this toolbar was introduced to give users more flexibility than the older keyboard-only shortcuts. This connects closely with another common issue — see How to Connect a Mac to a TV or External Monitor for more on that. This detail matters more than it seems once screenshot on a mac comes up again.
Step 5: Save Your Screenshot to Clipboard Instead of a File
Not every screenshot needs to become a saved file cluttering your desktop. If you’re just pasting an image into an email, document, or chat, you can skip the file-saving step entirely. Simply add the Control key to any of the shortcuts above, for example, Shift + Command + Control + 4. Instead of saving to your desktop, this will copy the image directly to your clipboard. From there, you can paste it anywhere with Command + V. This trick to save screenshot to clipboard is a favorite among people who take screenshots constantly for work communication, since it avoids piling up random image files that you’ll eventually need to delete or organize. It is one of those small things that makes screenshot on a mac easier to manage overall.
Step 6: Set a Timer for Delayed Captures
Sometimes you need a few seconds to set up a menu, open a dropdown, or arrange something on screen before capturing it. Using the Screenshot toolbar from Step 4, click “Options” and choose a timer of five or ten seconds. This gives you time to click into a different app, hover your mouse where you want it, or trigger a notification before the screenshot fires automatically. It’s a small feature, but it makes a real difference when you’re trying to screenshot entire screen mac setups that involve hovering menus or tooltips that disappear the moment you move your cursor away. Without this delay, capturing those fleeting on-screen elements would be nearly impossible using the instant shortcuts alone. This is a common part of dealing with screenshot on a mac, and it is worth keeping in mind.
Step 7: Edit and Share Your Screenshot with Markup
Once you’ve captured your image, macOS gives you built-in tools to annotate it without opening a separate app. Click the thumbnail that appears after taking a screenshot, and a markup window opens where you can draw arrows, add text boxes, highlight sections, crop the image, or blur out sensitive details like phone numbers or account information. When you’re finished, you can drag the file directly into an email, Slack message, or Messages conversation, or save it to a folder of your choice. This built-in markup tool means most people never need third-party software for basic edits, though some designers prefer more advanced apps for pixel-perfect adjustments, similar to what’s described on Wikipedia’s general overview of screenshots and their common uses across different operating systems. You might also find our article on How to Update macOS Safely Without Losing Data helpful here. Many people run into this exact issue with screenshot on a mac at some point.
Quick Reference: Screenshot Shortcuts Compared
With several shortcuts to remember, it helps to see them side by side. The table below breaks down each method, what it captures, and where the image ends up, so you can quickly pick the right one depending on your situation. Keeping screenshot on a mac in mind here will save you time later on.
| Shortcut | What It Captures | Default Destination |
|---|---|---|
| Shift + Command + 3 | Entire screen | Desktop (PNG file) |
| Shift + Command + 4 | Selected area | Desktop (PNG file) |
| Shift + Command + 4, then Spacebar | Single window | Desktop (PNG file) |
| Shift + Command + 5 | Customizable (screen, window, or area) | Desktop or chosen folder |
| Add Control to any shortcut | Same as chosen shortcut | Clipboard, not saved as a file |
Once you get comfortable with these shortcuts, taking a screenshot on a Mac becomes second nature, almost like muscle memory you don’t even think about anymore. Whether you’re documenting a bug for tech support, saving a recipe from a webpage, or capturing a funny text exchange to send to a friend, these seven methods cover nearly every situation you’ll run into. The built-in tools in macOS are reliable, fast, and don’t require installing anything extra, which is part of why so many long-time Mac users rarely bother with third-party apps. If you found this guide helpful, bookmark it or share it with a friend who’s still taking photos of their screen with their phone, because there’s a much easier way built right into their computer. This detail matters more than it seems once screenshot on a mac comes up again.
Frequently Asked Questions
Where do screenshots get saved by default on a Mac?
By default, screenshots save to your desktop as PNG files. You can change this location using the Options menu in the Screenshot toolbar (Shift + Command + 5) and choosing a different folder, such as Documents or Downloads. For a related walkthrough, check out How to Recover Deleted Files on a Mac. It is one of those small things that makes screenshot on a mac easier to manage overall.
Can I change the file format of my screenshots?
Yes. While PNG is the default, advanced users can change the format to JPG, TIFF, or PDF using Terminal commands, though most people find PNG works perfectly fine for everyday needs without any adjustments. This is a common part of dealing with screenshot on a mac, and it is worth keeping in mind.
Why isn’t my screenshot shortcut working?
This usually happens when another app or system setting has claimed that same keyboard shortcut. Check your keyboard shortcut settings in System Settings under Keyboard, and make sure the screenshot shortcuts haven’t been disabled or reassigned. Many people run into this exact issue with screenshot on a mac at some point.
How do I take a screenshot on a Mac without a keyboard?
You can open Launchpad and search for the Screenshot app, which gives you all the same capture options as the keyboard shortcuts through a simple on-screen interface with clickable buttons. Keeping screenshot on a mac in mind here will save you time later on.
Does taking a screenshot on a Mac work the same way on all models?
Yes, these shortcuts work consistently across MacBook Air, MacBook Pro, iMac, and Mac Mini, as long as you’re running a reasonably recent version of macOS. Older systems may have slightly different toolbar options, but the core shortcuts remain the same. This detail matters more than it seems once screenshot on a mac comes up again.