
Recover Data from a Dead Phone: 7 Easy Steps to Try
Your phone slips into a puddle, or your laptop suddenly refuses to boot, and in that first panicked moment, your mind jumps straight to the photos, messages, and documents trapped inside. The good news is that you can often recover data even when a device seems completely dead. Hardware failure doesn’t always mean your files are gone forever — it usually means the storage chip is fine, but the pathway to reach it is broken. Understanding the difference between those two problems is the first step toward getting your memories and work back.
Before you try anything drastic, it helps to know that most “dead” devices aren’t actually dead in the way they appear. A phone with a cracked screen or a laptop that won’t power on has usually suffered a component failure somewhere in the charging circuit, display, or motherboard — not necessarily in the storage itself. That distinction matters because it changes your entire recovery strategy. Some fixes take five minutes with tools you already own, while others require specialized software or a professional lab. Below are seven practical steps to try, roughly in order from easiest to most involved, so you can recover data without making the situation worse. If you want to dig deeper, our guide on How to Choose Between iPhone and Android in 2026 covers this in more detail. This is a common part of dealing with recover data, and it is worth keeping in mind.
Step 1: Confirm the Device Is Actually Dead
Before assuming the worst, rule out simple explanations. A phone that won’t turn on might just have a completely drained battery, a faulty charging cable, or a stuck power button. Plug it into a different charger and outlet, and leave it for at least 30 minutes before trying to power on again. For a computer won’t turn on situation, check that the power strip is switched on, the cable is firmly seated, and any laptop battery isn’t simply exhausted. Look for small signs of life — a charging light, a faint vibration, a fan spinning briefly. These clues tell you whether you’re dealing with a dead battery, a dead screen, or something more serious happening internally. Many people run into this exact issue with recover data at some point.
Step 2: Try Safe Mode, Recovery Mode, or an External Display
If the device powers on but the screen stays black, the problem might be the display rather than the internals. Try connecting a computer to an external monitor using an HDMI or USB-C cable to see if the desktop appears. For phones, listen for notification sounds or try connecting to a Bluetooth speaker to confirm the operating system is still running behind a broken screen. Many smartphones and computers also have a recovery mode or safe mode, accessible through specific button combinations, that loads a stripped-down version of the operating system. Getting into this mode is often enough to access files and copy them elsewhere before attempting any deeper repair. Keeping recover data in mind here will save you time later on.
Step 3: Check the Cable, Port, and Battery Separately
A surprising number of “dead” gadgets are suffering from something as mundane as a worn-out charging cable or a corroded port. Test with a different cable and, if possible, a different power adapter, since either one can fail without obvious signs of damage. For laptops with removable batteries, take the battery out and try running the machine on wall power alone, since a swollen or failing battery can sometimes prevent the whole system from starting. If you have access to a friend’s charger or a spare cable, testing your device with entirely different accessories helps you isolate whether the fault lies in the device itself or in the equipment around it. This connects closely with another common issue — see How to Cast Your Phone Screen to a TV for more on that. This detail matters more than it seems once recover data comes up again.
Step 4: Remove and Connect the Storage Drive Externally
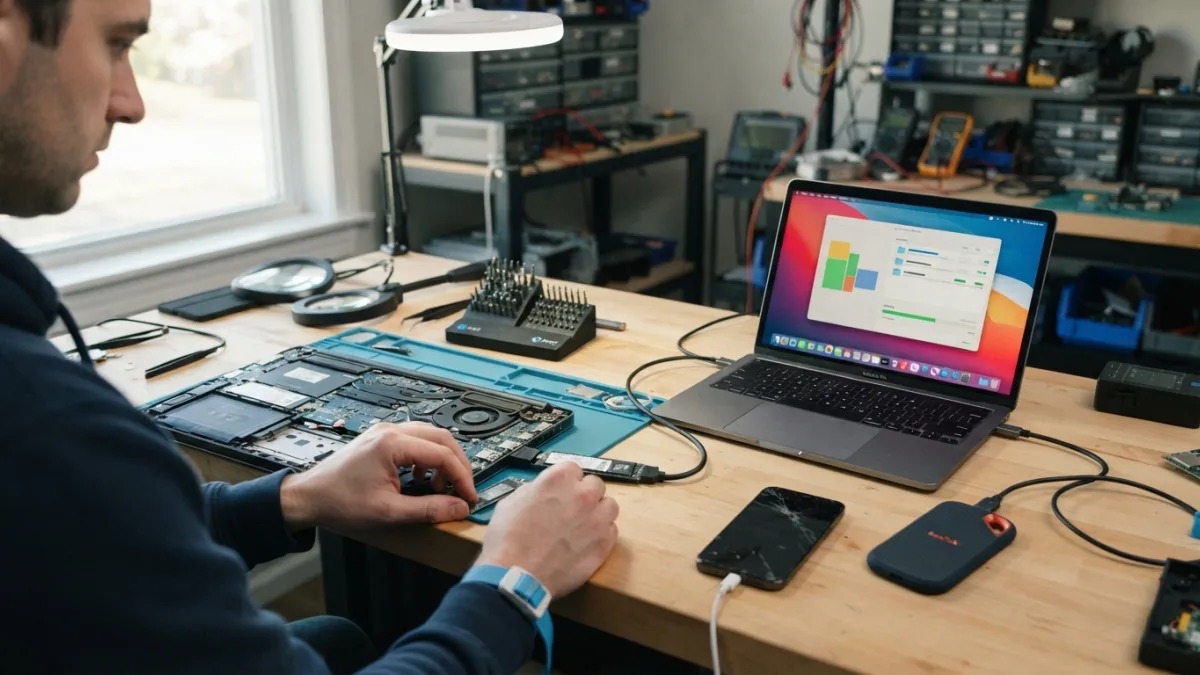
This is often the single most effective way to recover data from a computer that refuses to start. If you’re comfortable opening the case, remove the hard drive or solid-state drive and connect it to another computer using a USB enclosure or docking station, both inexpensive and widely available. Once mounted as an external drive, you can usually browse the files directly and copy anything important to a safe location. This method works because it bypasses the failed component entirely — whether that’s a broken motherboard, a dead power supply, or a corrupted operating system — and lets you interact with the storage on its own terms. It’s a reliable way to backup dead hard drive contents before deciding whether the original machine is worth repairing. It is one of those small things that makes recover data easier to manage overall.
Step 5: Use Data Recovery Software
When a drive is accessible but files seem to have vanished, been deleted, or the drive shows as unreadable, dedicated data recovery software can often pull files back from what looks like empty space. These programs scan the drive at a low level, searching for file signatures and remnants of data structures the operating system can no longer see. Popular options include Recuva, Disk Drill, and EaseUS Data Recovery Wizard, each offering free tiers for basic recovery and paid versions for more thorough scans. The general principles behind data recovery rely on the fact that deleted files often remain physically present on a drive until new data overwrites them, which is why acting quickly and avoiding further use of the device improves your odds significantly. This is a common part of dealing with recover data, and it is worth keeping in mind.
Comparing Popular Data Recovery Software
Not every recovery tool suits every situation, so it helps to know what each one is generally best at before you install anything. Free versions typically cap the amount of data you can restore, while paid tiers unlock full recovery and support for more file types. Here’s a quick comparison of some widely used options. You might also find our article on How to Set Up a Backup Routine You'll Actually Stick To helpful here. Many people run into this exact issue with recover data at some point.
| Software | Best For | Free Version Limit | Platform |
|---|---|---|---|
| Recuva | Deleted files on Windows drives | Unlimited scanning, basic recovery | Windows |
| Disk Drill | Formatted or corrupted drives | Up to 500MB | Windows, Mac |
| EaseUS Data Recovery Wizard | Photos, videos, documents | Up to 2GB | Windows, Mac |
| PhotoRec | Advanced users, photo recovery | Fully free, open source | Windows, Mac, Linux |
Step 6: Retrieve Photos from a Broken Phone Using Cloud Backups
Before you attempt any physical repair on a smartphone, check whether your photos and files were already backing up automatically in the background. Most people set this up during initial setup and forget about it entirely. If you have an iPhone, log into iCloud.com from any browser to see whether your photos synced before the device died, following the guidance in Apple’s iCloud backup instructions. Android users should check Google Photos and Google Drive on a computer, since Google’s backup and restore support page explains exactly what gets saved automatically and how to restore it to a new device. This step alone resolves dead phone data recovery for a large number of people without touching the broken hardware at all. Keeping recover data in mind here will save you time later on.
Step 7: Send It to a Professional Data Recovery Service
If the drive makes clicking or grinding noises, if it was damaged by fire or water, or if none of the earlier steps worked, it’s time to call in professionals. Data recovery labs use cleanroom environments and specialized equipment to physically repair drives or extract data directly from damaged memory chips. This route costs more — often several hundred dollars — and can take days or weeks depending on the damage, but it remains the best option for truly critical files that other methods couldn’t reach. Look for a service with transparent pricing, a no-data-no-fee policy, and clear communication about what they find before charging you for a full recovery. This detail matters more than it seems once recover data comes up again.
What to Do While You Wait or Decide
Once you’ve tried the accessible steps, resist the urge to keep restarting the device repeatedly, since that can worsen mechanical damage on a failing drive. Set the device aside somewhere safe and dry, and avoid opening it further if you’re not confident about the repair. If you’re weighing whether professional recovery is worth the cost, consider how irreplaceable the files actually are — a work document you can recreate is very different from the only copies of childhood photos. Making a short list of what you actually need back often clarifies whether it’s worth paying for specialized help or simply moving forward with a fresh device. For a related walkthrough, check out How to Choose a Laptop: 7 Essential Specs to Check. It is one of those small things that makes recover data easier to manage overall.
Preventing This From Happening Again
Once your files are safe, it’s worth setting up habits that make the next hardware failure far less stressful. Automatic cloud backups, an external drive you plug in monthly, or simple built-in tools like Windows File History and Time Machine on Mac all reduce the chances of losing anything important. Set a recurring reminder if backups don’t happen automatically for your setup, and consider keeping at least one copy of your most important files somewhere physically separate from your main device. A dead phone or computer will always be inconvenient, but it doesn’t have to mean losing everything stored on it. This is a common part of dealing with recover data, and it is worth keeping in mind.
Frequently Asked Questions
Can I recover data from a phone that won’t turn on at all?
Often yes, especially if the problem is the screen, battery, or charging port rather than the storage chip itself. Cloud backups, safe mode access, or professional extraction from the memory chip can usually retrieve your files even when the phone shows no signs of life. Many people run into this exact issue with recover data at some point.
How much does professional data recovery cost?
Prices vary widely depending on the type of damage and the drive involved, typically ranging from around $100 for simple logical recovery to several hundred dollars for physical repairs in a cleanroom. Always ask for a quote before authorizing the work. Keeping recover data in mind here will save you time later on.
Is it safe to keep using data recovery software on a failing drive?
It’s fine for logical issues like accidental deletion, but if the drive is making unusual noises or was physically damaged, further use can cause permanent data loss. In those cases, power it down and consult a professional instead. This detail matters more than it seems once recover data comes up again.
What’s the fastest way to retrieve photos from a broken phone?
Check your cloud backup first, since Google Photos or iCloud may already have synced your images automatically. If nothing was backed up, connecting the phone to a computer or removing the storage chip are the next best options. It is one of those small things that makes recover data easier to manage overall.
Should I try to open my computer or phone myself?
Basic steps like removing an external hard drive enclosure are fine for confident users, but opening a phone or laptop’s internal storage without experience risks further damage. When in doubt, back up what you can externally and let a professional handle the rest. This is a common part of dealing with recover data, and it is worth keeping in mind.